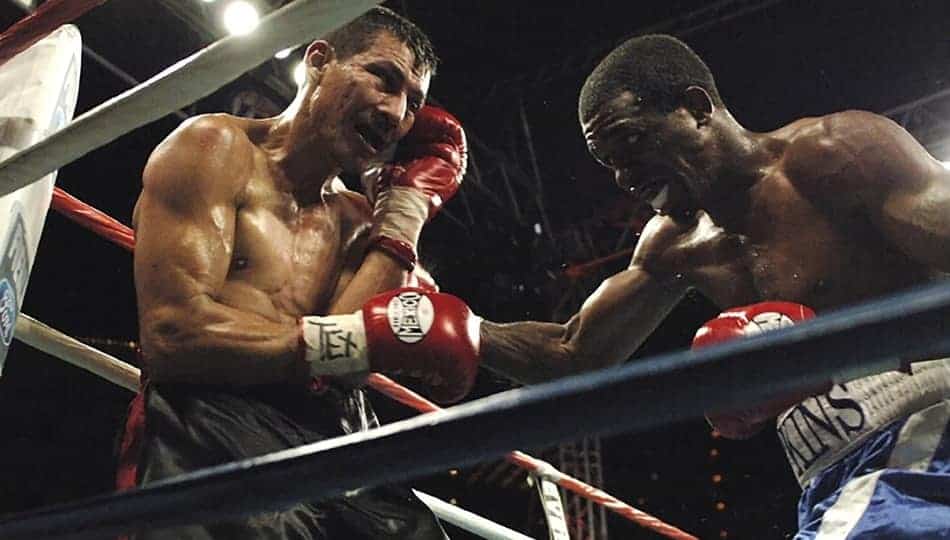
You’ve probably watched all these videos where some boxers do different exercises in the gym. I am talking about boxing drills such as heavy bag work, shadowboxing, jumping rope etc.
But if you’re wondering which of them you should do and you’re looking for a complete boxing workout, you are in the right place. In this article, we are going to talk about the best boxing workout routine for beginners.
Also unlike most of the other articles out there, I will give you exact tips on how to do the exercises, plus how many sets and reps you should do for every exercise and even how long you should rest between the sets. Before you continue, you can click here if you want to get a free pdf file with the shorter version of the boxing workout routine, for which I talk about in this article.
We will talk about all these things but first, let’s see what actually are our goals when we train for boxing.
Workout goals
When it comes to boxing there are two main goals we aim for:
- Improving our technique
- Improving our conditioning
We want to improve both of them every time we workout out. Our conditioning is important because no matter how good our boxing skills are, if we can’t box for more then 4-5 rounds, even less skilled boxers will beat us. And the opposite – if we are in a great physical shape but our technique is poor, everyone with a little more skill, experience, and understanding of boxing can outbox us easily.
Conditioning
When it comes to conditioning for boxing, there 3 main things we need to develop:
1) Explosive power – One of the most important factors of the punching power is not the strength like many people think, but the explosive power. Which basically is the maximum amount of force we are able to generate for a minimum period of time.
If we want to punch harder we need to improve our explosive power. And the best way to do that is by doing exercises for multiple muscle groups, which require fast (explosive) movements. Those are exercises such as pull-ups, Plyo push-ups, burpees etc, (we will talk about them more in depth later).
Also, if you want to improve your explosive power I don’t recommend doing isolation exercises (such as biceps and triceps curls, bench press and all these exercises that bodybuilders do). They may help you build more muscle mass, but won’t make you punch harder. Too much muscle mass will slow you down, make your movements stiffer which will decrease your punching power rather than increasing it.
2) Cardio – The lack of cardio can break a boxer. That’s why the pro boxers focus so much on their cardio when they are preparing for a fight. In this article, we will talk about the right way to work on your cardio because there are some things that can go wrong when trying to improve it. For example, many people think that you need to do slow pace, long distance “marathons” if you want to increase your cardio for boxing. But that actually can’t be further from the truth.
That’s because boxing is about explosive power. And that type of cardio exercises – the slow pace-long distance one, is improving your endurance but meanwhile is REDUCING your explosive power.
So instead of the so-called “marathons”, is much better for you to do intervals of sprints. That way you will work on your cardio but also on your explosive power. You can see the difference if you look at pictures of a marathon runner and a sprinter. It’s obvious who is the more explosive athlete.
3) Overall strength and body conditioning – For boxing, there are certain muscles which are more important than the others. That’s the leg muscles (from where the power comes), the core muscles, the back and shoulders, and the arm muscles. So it’s a good idea to train them.
Also, we need to train our nervous system to be prepared for the shock caused by the punches. Our core and our knuckles are the parts of the body that will take the most punishment while fighting, so we need to condition them properly.
The conditioning of our hands and wrists is really important too so we can hit hard without injuring ourselves. I will show you some cool isometric exercises which will help you to condition them.
Are you ready to get your inside-fighting to the next level?
Watch a FREE Online Boxing Course by the boxing coach Brandon Ray!
You’ll learn:
1. How to fight bigger/taller opponents
2. How to close the distance without getting hit
3. Defense and Offense in the pocket
Technique
Here are the main things we should focus on when trying to improve our boxing technique:
1) Punching (coordination, distance judgment, and combinations)
In order to punch hard, you need to generate power through your whole body, not just from the arm. The rotation of the feet, the hips, and the spine is what actually makes a punch powerful. But if you’re a beginner, chances are it will be hard for you to execute the proper technique. That’s why we are going to work on the coordination of your whole body.
Through repetition, you will develop muscle memory and you will be able to punch faster, harder, more accurate, and you will know how to throw the best boxing combinations without even thinking about it.
Also, it’s important to improve your distance judgment. It may look easy when you see how other boxers do it, but sometimes it’s actually hard to judge the distance so you can land a powerful but also precise shot during a fight when your opponent is constantly moving.
2) Footwork – Some boxers will tell you that footwork wins fights. And that’s actually true. You can’t punch somebody before first stepping into the right distance and you can’t defend yourself effectively if your footwork isn’t on point. When your opponent attacks you can’t just cover yourself up, you need to move back or to pivot, to get yourself out of the bad situation.
In this article, I will show you the best boxing footwork drills for beginners for improving not only your mobility but also your balance. Because without good balance it’s easier for your opponent to knock you down even with a simple push. The balance is also important when it comes to throwing hard shots (remember that the power comes from the feet).
3) Defense – There are many ways to defend a punch in boxing. The easiest way is just to block it with your glove. But you can also use footwork to dodge the shot – to move away from it, to slip it or to parry it. Those are more advanced skills, but in a minute we’ll get into the best drills for slipping punches, for bobbing and weaving and blocking.
Also, we are going to train counter punching. Because you can’t win a fight only by defending punches, you need to fire back. And the counter punching is the best way to do it. It simply means to land a shot right after you made our opponent miss by slipping, blocking or parrying his punch.
Tips:
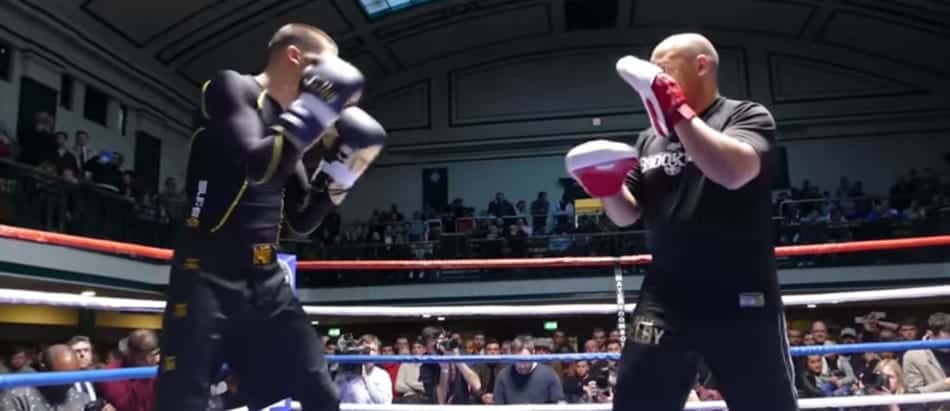
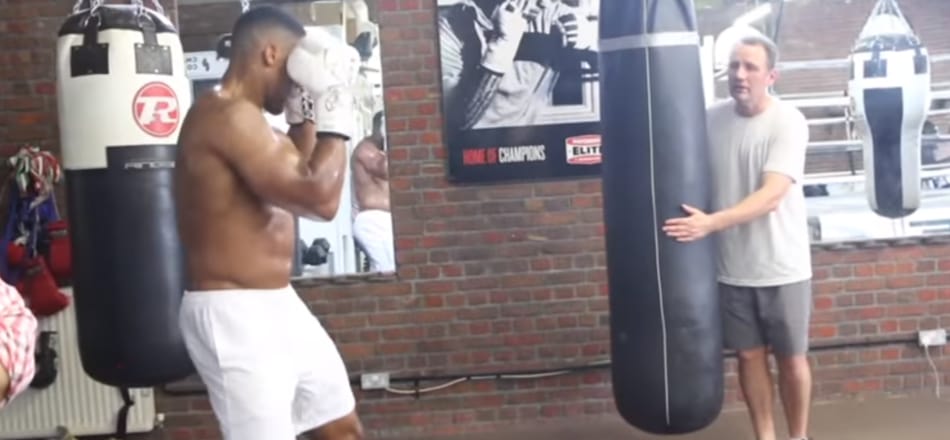
1) You can absolutely do some of the exercises in your home without any equipment or a sparring partner. And that will improve your skills significantly after just a few weeks. But if you want to get the maximum of it, I recommend training in a gym or with a sparring partner or at least using some basic equipment like a heavy bag, gloves, wraps etc.
Because the person who spars, and works on the heavy bag, double end bag 10 of 10 times will be better prepared from someone who is just shadowboxing and doing conditioning exercises.
You’ll see gear recommendations after some of the exercises in this article. Those some of the best gloves, wraps and other pieces of equipment I have ever used so feel free to check them out.
2) Don’t go to your max every day when training. Go to 70-80% of your max. Focus on volume, not on intensity. That way you won’t feel sore and you’ll be able to work out almost every day.
Monday (punching combinations, power + core exercises)
We will start the week with exercises that will improve your hand coordination and help you throw better punching combos.
Warming up
Start with full body stretch to prevent injuries in your joints. Then do 20 quick push-ups and 20 jumps squats.
1) Combinations
Now is time to start with the combinations. For this exercise, you can use a heavy bag if you have one. If you don’t, you can just shadowbox. But it will be good if you have something that you can hit, so you can feel the actual distance of your punches. You can use a tape or something you can hang somewhere. The idea is not to have something to hit to help you feel your distance.
Exercise 1 – Long distance combinations:
Stay at the end of your reach from the heavy bag/the object you’re going to hit. Throw a quick jab. Then wait for a split of the second and throw a jab-cross. Then move away (imagining that there is an opponent who tries to counter you). You can circle around the heavy bag or the object or move back. After 2-3 seconds, throw another jab, followed by another jab-cross. Do this 5 times.
As you’re done, do the same but this time finish the combination with a lead hook. Jab, Jab-Cross, Lead hook – moving away. Again do this 5 times.
Then, without resting, start throwing 4 punch combination after the jab. Throw a right hook after the lead hook to finish the combo. After you do this 5 times you can rest for 40 seconds. Then do the same thing, but start with 4 punches combination and end with the jab cross. Here is how it looks:
First set:
- Jab-> Jab-Cross (x5)
- Jab-> Jab-Cross-Lead Hook (x5)
- Jab-> Jab-Cross-Lead Hook-Rear Hook (x5)
- Rest – 60 – 90 seconds
Second set:
- Jab-> Jab-Cross-Lead Hook-Rear Hook (x5)
- Jab-> Jab-Cross-Lead Hook (x5)
- Jab-> Jab-Cross (x5)
Tip: The first jab doesn’t need to be powerful, it needs to be fast. Its purpose is to help you find the right distance to throw the following combination.
Gear:
Freestanding heavy bag – In case you are going to workout in your home I suggest investing in a good free standing like this one on Amazon. It’s awesome because it’s not moving around when you are punching it like the most of the freestanding bags.
Gloves – If you are like me and you don’t want to invest in two pairs of gloves (for bags and for sparring) you’ll need a pair of gloves that will work for both types of drills. Those should be gloves that will protect both your hands when working on the heavy bag and your sparring partner whne sparring. An awesome and low-price option are TITLE Boxing Pro Style Training Gloves. You can check them on Amazon here. I recommend using 14 oz size (not too big nor too small).
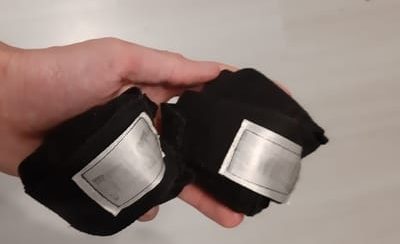
Hand wraps – Boxing hand wraps will additionally protect your knuckles, the skin on your knuckels from rubbing when punching and support your wrists. I found those wraps on Amazon – they are really protectinve, comfort and cheap.
2) Power exercise
The goal of the next exercise is increasing the punching power of the rear hand. Ideally, you should do it on a heavy bag or on something that you can hit hard.
Exercise 2 – power right cross:
Get in a proper boxing stance. Get at the right distance to land a right cross (or left cross, if you’re a southpaw). Throw it with full power, like you’re trying to knock someone out and try to land it at the height of your chin. Then quickly get your hand back on your cheek. After you do that, make 2-3 small steps to your right or to left (like when fighting and circling around the opponent), then stop and throw another powerful cross. Do this for 2 minutes. Then rest for 40 seconds. Repeat the exercise 4 times.
When moving is important to do it in a proper way. In boxing that means to step with your left foot first as you going to your left, and vice versa. Use the same principle when moving back and forward – step with the front foot first as you go forward and with your back foot as going back. That way you can cover more distance without crossing your feet and losing balance.
Try to hit the target with the first two knuckles (even if you wear gloves) and don’t bend your wrist when hitting. Keep your feet planted and start the punch by pivoting the back foot and rotating the hips. Then rotate your upper body and release the blow. Another trick that will help you to punch with a proper technique is to imagine you want to hit the target with your elbow. Also, imagine hitting 3 inches behind the target. That will help you to find the right distance.
If you don’t have any gear at all (no heavy bag, no gloves), you can just shadowbox. But if you do so, I don’t recommend fully extending your arm when hitting, because you can injure your joints. Throw lazy punches but try to pivot your foot and rotate your upper body properly. That way you will still work on your power while avoiding injuries.
Exercise 3 – Body uppercuts:
This exercise is very similar to the previous one – you need to go full power. But this time we are going to work on body shots. Let’s go through the steps:
- Get in your stance and get closer to the bag
- Keep your hands up – do a high guard
- Keep your knees slightly bend and use them when punching to add more power to the blow
- Get close to the bag. This time we’re going to fight from the inside – close to our opponent
- Throw combinations of powerful left and right uppercuts. You can alternate or throw double left or right uppercuts
- Bob and weave and slip punches all the time – imagine your opponent trying to counter every attack
- Keep the right hand up when throwing left uppercuts and vice versa
- Circle around the bag between the combinations
Do 3 sets of this exercise for 2 minutes each and rest for 40 seconds between the sets.
Tips:
- Focus on mastering the left uppercut. It’s much more devastating than the right one because when throwing it, you can catch your opponent in the liver.
- You can do the same exercise on mitts (if of course there is someone who can hold them for you).
- If shadowboxing, you can throw the uppercuts with full power. They aren’t straight punches so the chances to injure your joints are minimal.
3) Core exercises
Your core muscles can reduce the impact of the body shots significantly. So it’s really important to train them. Usually, when I do core exercises I like to do timed sets, not repetition based. I just notice better results. So here’s is what we are going to do today:
Exercise 4 – Core:
- 30 seconds sit-ups
- 30 seconds leg raises
- 30 seconds mountain climbing
- 30 seconds plank on forearms
- Rest 40 seconds
Repeat the same thing 2 more times, and rest 40 seconds between the sets.
Tips:
- When doing sit-ups keep your knees at 90 degrees. You can keep them together or open them a little bit – depends on which way is more comfortable for you.
- For the leg raises, keep your hands under your butt, to support you. Then lift your legs at 90 degrees and slowly back down.
- When doing mountain climbing, do it slowly. Imagine walking, and not running.
- If the plank is too hard for you, you can start with your knees touching the ground. Once you can do it for 30 sec easily, tuck your toes under and lift your hips off the ground.
4) Warming Down
Good job, you’ve done the hard work, now is time to warm down. We are going to do it by jumping rope. This exercise will not only help your muscles to warm down, but it will also improve your boxing footwork.
Exercise 5 – Jumping rope (200 times)
If you’re a beginner and can’t jump properly yet, you can try doing the first 50 without a rope (just jump on your toes).
For then do the next 50, grab a rope in your hand and start just swinging it (without actually jumping over it). Try to time it when jumping.
The last 100 jumps you can do by jumping slowly with frequent breaks. Your first goal will be to make 5 jumps, then 10, then 15 and so on.
Tip: Jump on your toes (it will be hard in the beginning but you’re going to get used to it quickly). Also, bend your knees as you land to avoid injuries in the joints. Breath in through the nose and breath out through the mouth.
Gear: You don’t need to invest much for a good jump rope. I wouldn’t spend more than $20. The three things a good jump rope has are adjustable length so you can use it no matter how tall you are, lightness and durability. I found this great jump rope which cost me $10. I’m not sure how much it costs now, but you can check its price on Amazon.com.
Tuesday – (sparring / circuit training
+ core conditioning)
Today you’ve got two options – to do a circuit boxing workout for conditioning, power, hand speed, and accuracy or to do sparring workout – free sparing plus some blocking and counter punching techniques. I recommend doing the sparring workout because that’s maybe the most important boxing exercise and it really prepares you for a real fight. And yesterday we already did conditioning exercises so it’s good to alternate them with sparring.
But if you train at home and you don’t have a sparring partner, do the conditioning workout. No matter which one you choose, after you’re done with it, we’re going to do some core conditioning.
Conditioning workout
This is an intense workout which really going to get you into shape. It’s will improve your conditioning but also your technique. We will start with a quick warm-up.
Warm up:
- 100 rope jumps
- 20 burpees
Workout:
We are going to do each exercise for 2 minutes with 40 seconds rest between the different exercises. And also we’re going to repeat the whole set 3 times. First set:
Exercise 1 – Free heavy bag work (2 min) – “free” means that you can do whatever you want. Try different combos, movements, and don’t forget about the defense
Rest (40 sec)
Exercise 2 – Shadowboxing with weights (2 min) – Here, again, you can try whatever you want. I recommend imaging fighting against a real opponent. Throw single punches but also combinations. Also, try to exit after every attack. You can do that by moving back, pivoting or by slipping or bobbing and weaving.
Gear: Basic 3-5 lb weights like these on Amazon.com would work just fine. Just don’t use too heavy weights and don’t overtrain with them if you don’t want sore shoulders and back.
Rest (40 sec)
Exercise 3 – Medicine ball throwing (2 min) – This exercise is great for increasing the power of your punches. You simply need to get a medicine ball, no matter what type it is (if it’s big or small). If you’re a guy I recommend using 12-14 lbs ball (or more, depending on your strength). And if you’re a lady 6-8 lbs is just fine.
Pick the ball up, get in your boxing stance and start throwing it against a wall. Throw the ball straight forward, imagine throwing a straight punch. Start with your right hand. Then switch the hands (and also switch your stances as you do so).
Gear: There are medicine balls that cost more than $100. I don’t recommend buying those. Don’t spend more than 50 bucks for this part of your equipment. A great choice on the lower end with good quality is the Amazon Basics Medicine Ball. There are different sizes so you can choose the one that fits you. You check the price of this ball on Amazon here.
Rest (40 sec)
Exercise 4 – Plank on forearms (1 minute) + Burpees (1 minute) – Don’t rest between these two exercises
Exercise 5 – Double end bag work (2 minutes) – This time, there aren’t specific combos or techniques you need to do. Try whatever you want, just make sure that you don’t stop during those 2 minutes. Don’t go full power. Focus on volume, not on power. You can do this exercise on a speed bag if you don’t have a double end bag (or you can just shadowbox if you don’t have any equipment).
Gear: There is a double end bag I found months ago that is extremely durable and has easy set up. The price it also good, you can check it on Amazon.com
Exercise 6 – Jumping rope (2 minutes)
*This is just the first set. After you’re done with it, rest for 2 minutes, and then do it 2 more times – Do all the exercises from 1 to 6 again. Make no mistake about it, it can be really hard the first time, especially if you aren’t trained.
Tips:
- When shadowboxing with weights, try to keep your hands up all the time. That’s the goal of this exercise – to help you keep your hands up all the time, even in the late rounds when you feel them really heavy.
- Don’t hit the double end bag with full power. Try to just touch it by punching with a proper technique. Otherwise, it will start spinning too fast and it will be really hard to catch it. If that happens, then change your position so you can face it again.
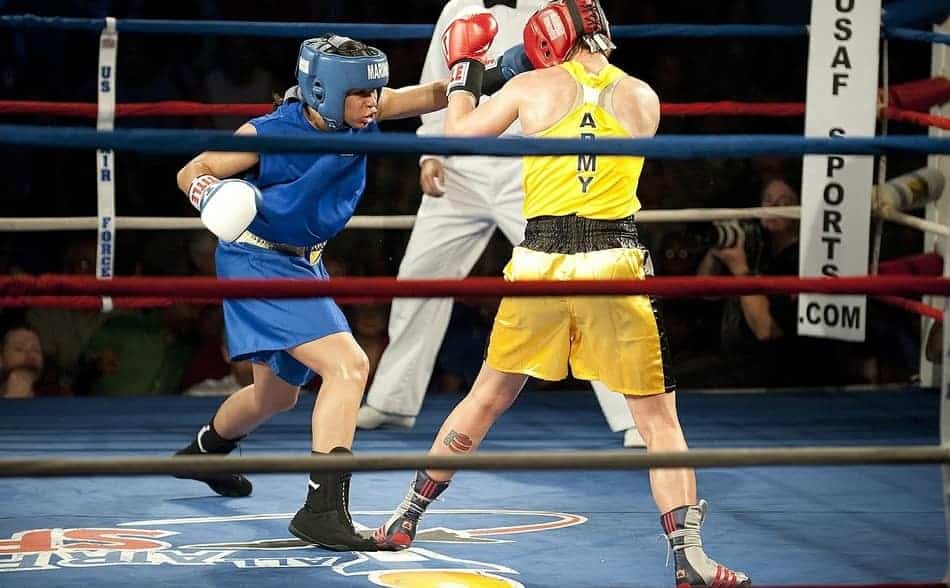
Sparring workout
With this workout, you will increase your timing, defense, distance judging, and your overall fighting abilities. Its focus is more on the technique rather than conditioning, so it’s much less exhausting than the other workout. (Its only drawback is that, while doing it, there is a good chance to get some punches in the face)
Warm up:
- 100 rope jumps
- 20 burpees
Workout:
We’re going to do 2-minute sparring rounds with 40-sec rest between them. After you improve your stamina, you can start doing 3-minute rounds.
Exercise 1 – Free sparring:
Free sparring means that you can try whatever you wanna try. But of course, don’t go too hard and don’t hurt your partner.
Do 3 rounds (with 40 seconds rest). If you’re a group of people, you can switch the partners after each round. Rest for 2 minutes after you’re done.
Gear:
Mouthpiece – If you’re going to spar, you’ll need to protect your teeth. There are tons of different mouthpieces out there but I was shocked when I saw the price of this mouthpiece on Amazon considering the quality of Venum stuff.
Gloves – As I already mentioned, you don’t need separate gloves for heavy bag work and sparring. I am using a great pair of 14 oz gloves for both activities and they are working just fine. I am not sure how much they cost now but you can check their price at Amazon.com. (If you are really big guy, or hard puncher I recommend using 16 oz gloves so you don’t hurt your sparring partner).
Headgear – A good headgear will prevent cuts on your face. It’s not 100% necessary to use one when sparring but if you don’t want to look like a boxer outside of the gym or the place where you spar, I recommend using a protective headgear with a good vision. It took me a lot of time to find such headgear on a fair price but I eventually found this one on Amazon.com.
Tips:
- Try to be technical, throw fast punches not powerful. Your goal is to land more shots than your opponent, not to brawl.
- Change your style for the different opponents. If you fight against a taller boxer, try to close the distance and fight in the pocket. And the opposite – if you face a shorter fighter, keep him at a distance, using your jab and your footwork.
- If you’re tired or hurt, stall the fight – get into a clinch or start circling around your opponent so he can’t catch you.
Exercise 2 – Blocking/parrying drills:
Now is time to improve our defensive and counter abilities. For this exercise, you simply need a sparring partner who needs to throw punches with roughly 80% power. The following exercises are called “controlled sparring”. That means that you need to throw a given combination/technique and your opponent needs to return another combo/technique.
Such exercises can be really helpful in a real fight because they train your muscle memory.
1) Parry a jab -> return a jab (2 minutes) – Get in your normal boxing stance, and face your sparring partner. Don’t stay too far away from him, where he can’t reach you. But also don’t stay too close, because you won’t be able to parry the punch quick enough.
When you both are ready, your opponent should throw a jab (with roughly 80% speed and power) at your face. You should parry it, using your rear hand (or your lead hand if you’re in opposite stances). Parrying simply means to knock the punch off the way with your glove, preventing it from reaching its target (your face).
As you parry it, throw your own jab, to the head of the other boxer. And of course, don’t go full power. This is a technical exercise.
Do it 5 times then switch roles – now you throw a jab and your opponent counters.
2) 10 Burpees – Do the previous exercise for two minutes, then do 10 quick burpees, without resting between the two exercises.
3) Rest for 40 seconds
4) Block a hook -> return a hook (2 min) – Again, get in your boxing stance and face your sparring partner. Now we’re going to block punches. Throw a left hook. Your sparring partner should block it with his right glove by bringing it on the side of his head and then to throw a counter right hook. After you block his hook, throw right hook this time, which your opponent should block with his left hand.
Do this exercise for a minute and try to not look like two robots, hitting each other – change the timing, the angle and the speed of every punch.
5) 10 high knee jumps
6) Rest for 40 seconds
7) Block uppercut to the body -> Return uppercut and cross (2 min) – This exercise is very similar to the previous two. But this time we’re going to include some body shots. And more specifically – uppercuts to the body.
You need to block an uppercut using your lead elbow (not your forehand). And then to return an uppercut to the head, followed by a cross to the head.
If you’re in an orthodox stance, your opponent should throw right uppercuts to your body and vice versa if you’re a southpaw.
Do this 5 times, then switch roles.
8) 10 squats – Without resting, do 10 quick squats.
9) Rest for 40 sec
10) Throw jab-cross > slip a jab and return a lead uppercut – This is the last one for today.
Throw a jab-cross combination at your sparring partner. He needs to block both punches and return a quick jab. You need to slip that jab to your left (or to your right if you’re a southpaw) and return a lead uppercut to the body or the head of the other boxer.
He shouldn’t know where you’re going to land the shot. So, for example, throw it 2 times in a roll to the head, then 2 times to the body, or alternate. The idea is to be unpredictable. That will improve your overall offensive and your sparring partner’s defensive skills.
Core conditioning
As I already mentioned, regardless of which workout you’re going to choose, you’re going to do some core conditioning exercises after it.
But again, you have two options:
1) To get hit in the stomach – the best way to condition your body to take punches is by actually taking some. Keep your hands on your neck and ask your sparring partner to throw some hooks to your body (with roughly 70-80% of his power) for 30 seconds. Then switch roles. Do this exercise 3-4 times.
2) If you don’t have someone to hit you in the stomach (never thought that could be a problem), you can use a medicine ball to condition your body. All you need to do is to lay on the ground and throw it up, so it falls on your stomach. This exercise may look weird but is actually very effective. You can start by throwing the ball lightly and increase the height each time.
Start with 3 sets of 10 throws, with 40-sec rest between them.
After that, without resting, do 100 sit-ups and 100 leg raises.
And that’s it! Do some stretching and you’re done with today’s workout.
Wednesday (cardio day)
After we’ve done the hard work on Tuesday, it’s time for some cardio exercises plus one cool exercise, which I am going to show you, that will help you handle a knockdown better. We’re going to start with it.
Exercise 1 – Spinning
This exercise will help you deal better with the dizziness after a knockdown or a hard punch. To do it you simply need to step in the ring and to go to one of its corners. Then get to the opposite corner by spinning in a circle. After that run to the corner where you start (run next to the ropes, not diagonally) and repeat the same exercise. Do this 4 times – 2 times spin to your left and 2 times to your right.
If there is no ring, you can do it in a room by spinning from corner to corner.
Exercise 2 – Running
After so many years, there’s still no better exercise for improving the endurance for boxing, than running. So it’s not a bad idea to run at least one time per week.
1) Jogging (1 mile) – We’re going to start with a light jogging so we can warm up.
2) Sprinting (600 yards) – Sprinting will improve not only your endurance but also your explosiveness, which is important for your punching power and speed. Do 4-6 intervals of 600 yard sprinting with 60-90 seconds rest between them. Sprint with roughly 80% of your max speed.
3) Very light jogging – Now it’s time to warm down. Do it by jogging 1 mile (you can go back to the same place where you started running).
Thursday (isometric exercises + combinations + head movement)
Today is an interesting day – we’re going to work on our head movement, do some cool combinations and punching techniques and do some isometric exercises for conditioning.
Warm up:
- 20 push ups
- 20 jump squats
Exercise 1 – Head movement (slipping, bobbing and weaving):
Head movement is a common defensive maneuver in boxing. And there are really only three ways you can improve your head movement – by doing sparring, by using a speed bag/double end bag or by using a slipping rope.
Today we’re going to use a speed bag. All you need to do is to go under the speed bag, to hit it, so it starts bouncing and to move your head so it doesn’t hit you. And don’t worry if you don’t have a speed bag. You can use just a string and your keys (or anything weighted). To do it, tie the string somewhere and put your keys on it.
The keys (or the weighted object) should be on the level of your head. If you train at home, you can tie it on your chandelier or anywhere where you can get that swinging motion. Once you’re ready, push it and start slipping it or bobbing and weaving under it, while keeping your hands up. To make it even more realistic, you can even throw some punches or work on your pivots. Do this exercise for 2 minutes. Then rest for 30 sec. Repeat it 4-5 times.
Tips:
- To slip a punch correctly imagine bringing your shoulder to the opposite knee.
- Move your head just enough to avoid the punch. If it’s a fist, that’s around 3-4 inches. And if it’s a glove, that’s no more than 8 inches.
- Protect the opposite side – when slipping to the left, keep your right hand up and vice versa.
- Try to slip right after the punch is thrown. If the punch is halfway to you, it’s probably too late. Look at your opponent’s shoulders – that will help you to see the punch before it’s thrown.
- Don’t keep your head in the same position after you slip. Chances are your opponent will throw another punch again after he misses you. So be ready to slip again or to bob and weave, after you already slipped the first one.
Exercise 2 – Shadowboxing (combinations):
After the defensive workout, it’s time for some offensive combinations. This shadowboxing exercise will improve the coordination of your hands and your technique.
Do every drill for 30 sec, without resting between the different drills:
- Step in -> jab – Make a step forward with your lead foot and throw a jab
- Double Jab – Jab->Jab
- Step back->cross – Great counter-punching technique
- Jab – step – cross
- Jab – slip – cross
- Bob and weave – lead hook
- Block – check lead hook – pivot away
- Lead uppercut to the body – cross to the head
Exercise 2 – Isometric:
The following exercises will improve the conditioning of all of the important muscles for boxing. Don’t rest between the different exercises. After you’re done you can rest for 2 minutes and do the set again (all the exercises again).
- Plank on forearms (30 sec)
- Left side plank on forearms (30 sec)
- Right side plank on forearms (30 sec)
- Plank in push up position (1 minute) – this one is hard
- Rest for 2 minutes
- Do the set one more time
Friday (rest day)
Today you can still do some light cardio exercises. You can also go swimming, walk in the park or do some shadowboxing.
Saturday (footwork + strength)
The footwork is important for both – the defense and the offense. That’s why it’s one of the most important aspects of the game of every boxer.
So today we’re going to do some footwork drills. And after that some exercises for increasing the strength.
Warm up:
- Jumping rope (100 times)
Exercise 1 – Footwork drills:
Do each of the following exercises for 2 minutes with 40 seconds rests between them.
- Side steps – take 10 sidesteps to your right and then to your left
- Forward and back moving – Get into your boxing stance and take 10 steps forward and 10 back. Step with your front foot first when going forward and with your back foot first when going backward
- Circle around an object – Imagine an opponent in front of you. You need to circle around him, taking small steps. Also, don’t circle only in one direction. For example, take 3 steps to the left and then 1 to the right and then two more to the left. Try to trick your opponent.
- Pivot – Work on your pivots. Pivot 90 degrees to the left and to the right. Imagine a bull that is charging you and you’re trying to get out of his way, without getting your front foot off the ground.
- Free footwork drill – 30 seconds of free moving. It’s like the shadowboxing but without punching. If there’s a ring where you can do this exercise it would be perfect.
Tips:
- Stay on the balls on your feet while moving (not the heels). That way you will be much more mobile.
- Don’t take big steps – take small but quick steps.
Exercise 2 – Strength:
Now it’s time for some pure strength exercises. The weightlifting is good for improving your strength but I think that it’s not very effective when it comes to boxing because it doesn’t increase your explosive power. That’s why I prefer free weight exercises: (If you really like to lift, you can do that too, just make sure you use the best powerlifting belt to avoid injuries)
- Pull-ups – 7 sets 5-10 reps each (depending on your level)
- Push-ups – 3 sets of 10 push-ups (you can do clapping or jumping push-ups if the basic push-ups are too easy for you)
- Pull-ups for biceps – 5 sets 5-10 reps each
- Dips – 3 sets of 10 reps
You can rest as long as you need, but try to do it no more than 3 minutes between each set.
Tips:
- When doing push-ups, decide which type you want to do – for chest or for triceps. If you want to do triceps push-ups, place your hands shoulder-width apart. And if you prefer the chest push-ups, keep your hands a little bit wider apart.
- You can switch the types if you get tired. If your triceps get tired you can switch on chest push-ups and vice versa.
- Spread your fingers, don’t keep them together. That way you will have a much better support.
- Keep your feet together and try to look around 3-4 ft in front of you while you doing the push-ups (don’t look down)
- Breathe in as you’re going down and breath out as going up.
Sunday (rest day)
After a whole week of hard work, it’s time for some resting. But don’t forget that you can rest actively – you can do some light shadowboxing, footwork or light cardio exercises if you want and have enough energy.
Get the free pdf file of that routine!


woh I love your articles, saved to my bookmarks! .
Glad you enjoy them 🙂 Let me know if you have suggestions for future articles here in the comments!
I have a suggestion. If you can do that again but intermediate, thankyou.
I like this blog its a master peace ! .
I like you too!
Can you do a workout for more advanced fighters
We’re working on that!
Hey, I have a quick question for you. Is there a particular brand of drill driver you prefer? Dewalt seems pretty good. Or would I do just as well saving some money on a Ryobi? I’ve been using an old corded drill for years and I’m planning to upgrade to Lithium Ion. I really appreciate it!
your work is best
Thanks man!
It is good article thanks, I watched a video about Mike Tyson he do a lot of exercise for neck include neck bridge and docking I think having a good neck exercise is something we can add to your excellent article.
Thanks man, I am trying to learn how to box because most gyms are shut down during the pandemic. I want to learn how to become stronger mentally and physically. This helps a lot and I am trying to adapt to not sparring because again gyms are closed.
Thanks man, I am trying to learn how to box because most gyms are shut down during the pandemic. I want to learn how to become stronger mentally and physically so thanks.
Also, make sure that the gloves you purchase are designed to give you the right type of grip when you are punching. If they are too loose then it will give you problems when you are trying to throw the punches. It is better to buy boxing gloves that are adjustable for your hands, or are more comfortable than ones that are hard on your hands.